The creator of Rocky Linux has made the distribution available as a Docker image. Jack Wallen shows you how to get it, deploy it and modify it.

Illustration: Lisa Hornung/TechRepublic
Rocky Linux has emerged as one of the top contenders to replace CentOS for many businesses. And for most, that server-centric Linux distribution will be deployed mostly on bare metal or as a virtual machine. But there’s another route to take, one that should have container developers quite pleased.
The developers of Rocky Linux have released a container image, so you can start developing your containers based on the new Linux distribution from the originator of CentOS itself. The benefits of this include having a powerful, secure distribution for which to base your containers. And because this is an official release, you can be sure it’s been vetted and is safe to use.
SEE: Kubernetes: A cheat sheet (free PDF) (TechRepublic)
Of course, like most container-specific images, the Rocky Linux image has been stripped of some of the services and apps that wouldn’t be necessary for container deployment. That means you’re getting a bare-bones distribution that you can then use to build whatever you need. That, combined with the usual Rocky Linux security and reliability make this image a prime candidate for your container deployments.
Let’s find out how to add the Rocky Linux image to your growing Docker collection.
What you’ll need
To make this work, you’ll need a machine with the Docker engine installed and running. I’ll demonstrate on Ubuntu Server 20.04, but as long as you have Docker on the machine, the platform won’t matter.
That’s it. Let’s get to work.
How to pull down the Rocky Linux image
Log into your machine and open a terminal window. To pull down the Rocky Linux image, issue the command:
docker pull rockylinux/rockylinux
After a moment, the image will be saved to your local repository and is ready for use. You can verify the image is there with the command:
docker images
You should see rockylinux listed (Figure A).
Figure A
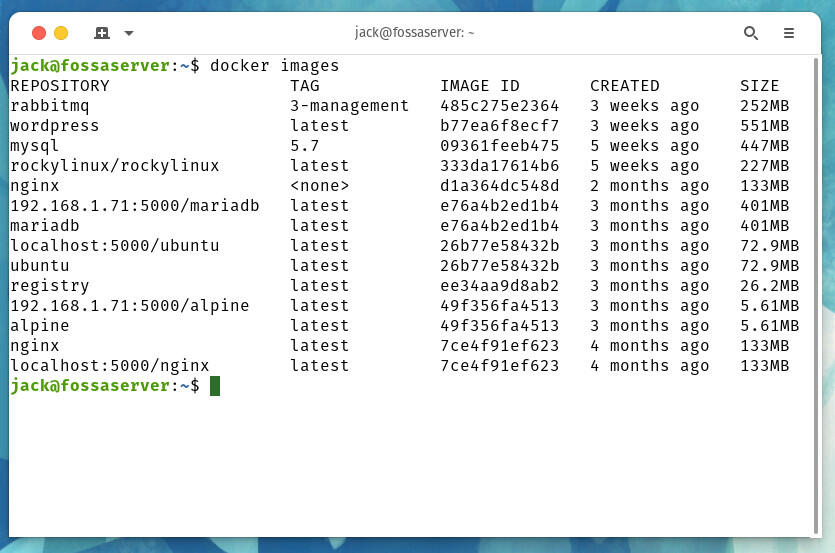
The Rocky Linux image has been saved and is ready to use.
How to create a container from the Rocky Linux image
While I have you, let me show you how to create a container from this image. We’ll call the container rlinux and deploy it in detached mode with the command:
docker run -it --name rlinux -d rockylinux/rockylinux
Let’s gain access to the container so we can work on it with the command:
docker exec -it --user root rlinux /bin/bash
From the container prompt, let’s install the Apache webserver with the command:
dnf install httpd -y
Start the httpd daemon with the command:
httpd
Check to see the server is running with the command:
curl localhost
You should see the output of the curl command fly by.
Exit from the container with the exit command, and you’re done. Your Rocky Linux container is up and running, and you’ve modified it by installing the Apache Web server. Now, let’s say you want to commit the changes and create a new image based on those changes. For that, you could issue the command:
sudo docker commit ID rlinux-template
Where ID is the Container ID of the modified image. If you list out your images, you should now see rlinux-template included (Figure B).
Figure B

You now have a container, based on Rocky Linux, which includes the Apache webserver.
You can destroy the original Rocky Linux container by first locating the Container ID with the command:
docker ps -a
Stop the container with the command:
docker stop ID
Where ID is the first four characters of the Container ID for your rlinux container. Remove the container with the command:
docker rm ID
Where ID is the Container ID for your rlinux container.
And that’s all there is to pulling down and using the Rocky Linux Docker container image. Enjoy developing your containers with one of the best server-centric distributions on the market.

Developer Essentials Newsletter
From the hottest programming languages to the jobs with the highest salaries, get the developer news and tips you need to know.
Weekly
Also see
Stay connected with us on social media platform for instant update click here to join our Twitter, & Facebook
We are now on Telegram. Click here to join our channel (@TechiUpdate) and stay updated with the latest Technology headlines.
For all the latest Technology News Click Here
For the latest news and updates, follow us on Google News.